
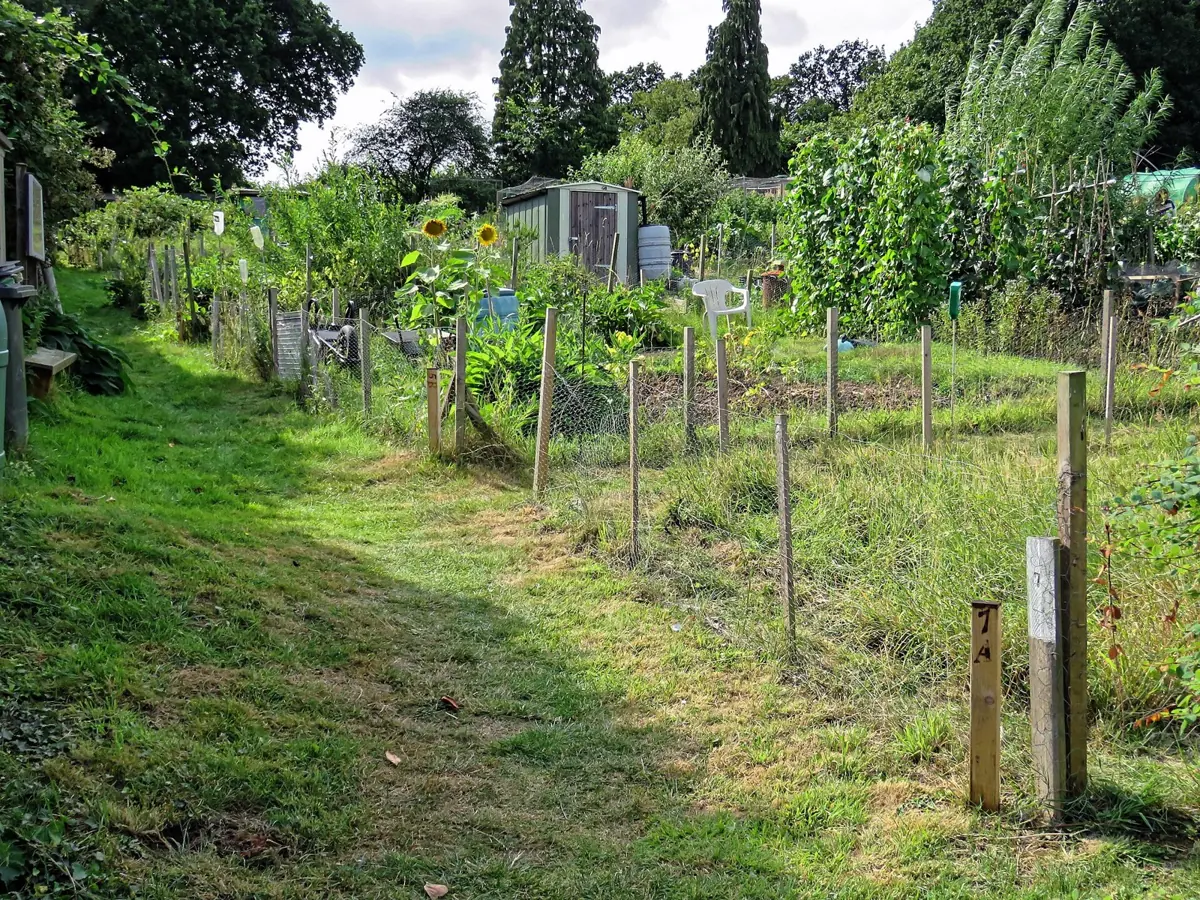
Before you start
Taking on an allotment is exciting, but a vacant or neglected plot can look like a whole season’s work before you have planted a thing. Give yourself permission to learn the site first. You do not need to clear every square metre or grow every crop in year one; a small, well-kept bed can provide a satisfying start while you bring the rest into use gradually.
Before bringing materials or building anything, read the tenancy agreement and ask the site secretary or committee about the rules. Allotment arrangements vary between councils, charities and self-managed sites, so another site’s practice is not a substitute for your own agreement.
- Ask about cultivation expectations, inspections, plot boundaries, shared paths, access and who to contact about repairs or hazards.
- Check which sheds, greenhouses, polytunnels, fences, fruit trees and other structures are permitted, and whether written permission or size limits apply.
- Ask how water is supplied, when taps are available, whether hosepipes or sprinklers are restricted, and what drought restrictions may be imposed.
- Find out the rules for compost heaps, manure deliveries, disposing of rubbish, bonfires and diseased plant material. Never burn or dump waste without checking the local rules; suspicious or hazardous items need the site manager’s advice.
- Ask whether livestock or poultry are allowed, and what welfare, fencing and nuisance rules apply. Do not assume they are permitted.
- Keep to paths, ask before entering another plot, and agree access before trimming a boundary or overhanging plant. Your tenancy may assign responsibility for maintaining plot edges.
- Use tools safely, wear suitable footwear and gloves, keep paths clear, secure structures and chemicals, and report exposed glass, unstable sheds, sharp metal, asbestos-like sheets or other hazards rather than handling them.
Your first visit: inspect before changing anything
Take a notebook, phone or camera, tape measure, sturdy shoes and gloves. Walk the whole plot slowly and look at it from the paths as well as from inside. Photograph the starting condition from the same few points; those pictures will help you plan and see progress without relying on memory.
Some established plants may be productive fruit, herbs, rhubarb, asparagus or flowers that support pollinators. Identify unfamiliar plants before removing them: a patch that looks untidy may be a crop or a useful perennial, while some invasive weeds need careful handling. If uncertain, photograph it and ask an experienced neighbour or use the site’s advice before digging.
- Measure approximate length and width, note the gate and boundaries, and sketch sheds, paths, trees and fixed features.
- Observe sun and shade at different times if you can. Note shade from trees, buildings and boundary hedges; one quick visit cannot show a full day’s pattern.
- Identify existing crops, fruit bushes and trees, flowering plants, annual weeds and likely perennial weeds such as couch grass, bindweed, ground elder or brambles.
- After rain, look for standing water, run-off, compacted patches and where water drains. Avoid judging drainage only during a dry spell.
- Look at soil colour, texture and structure in several places. A handful that smears and shines may be too wet to work; dry soil can hide how it behaves when wet.
- Check existing paths, gates, taps, sheds, glass, wires, fencing, holes and stored materials. Do not climb on unstable structures or disturb suspected hazardous waste.
Tools and equipment: start with the basics
Borrow tools from the site shed or another plot-holder if possible, and consider sound second-hand equipment. A few well-fitting tools are more useful than a large starter kit. Avoid buying materials until you know the plot dimensions, site rules and what can be reused.
- Essential: sturdy gloves and boots for protection; a hand fork for loosening soil and lifting small weeds; a hand trowel for planting; a spade or digging fork for beds that need opening; a hoe for small annual weeds; a rake for levelling seedbeds; a watering can for controlled watering; and a bucket or trug for carrying weeds and harvests.
- Useful but optional: secateurs for sound pruning cuts, a wheelbarrow for bulky materials, a tape measure and string for laying out beds, plant labels, a kneeler and a soil thermometer if you want to compare sowing conditions.
- Can wait: a rotavator, powered tools, greenhouse, polytunnel, elaborate raised beds, irrigation timer and specialist gadgets. First learn the soil, plot rules and crops you want to grow.
- Clean soil from tools after use, dry metal parts, sharpen cutting tools carefully, carry forks and spades point-down, and store tools where children and visitors cannot trip over or handle them.
Week 1 — assess and prioritise
Keep the first week observational and low-cost. A short conversation with the site secretary and neighbouring plot-holders can prevent avoidable mistakes. Decide on two or three achievable goals for the month, such as making one bed, setting up a compost area and planting a seasonal crop.
- Read the agreement and write down rules or restrictions that affect your plan.
- Walk, photograph and measure the plot; sketch sunlight, water, paths, structures and hazards.
- Identify plants before removing them and mark suspected perennial weeds for careful treatment.
- Check water access, site opening times, waste arrangements and where materials may be stored.
- Choose one manageable growing area and a first-month time budget that fits your life.
Week 2 — clear and prepare one area
Start where you can make a safe, useful bed without disturbing the whole plot. Wear gloves and sturdy footwear, work in daylight, and stop if you find sharp, chemical, asbestos-like or otherwise suspicious waste. Photograph it, keep people away and ask the site manager or council how it must be handled; do not put it in a bonfire or ordinary compost.
Annual weeds are usually shallow-rooted and can be hoed or pulled while small. Remove flower heads before they set seed. Perennial weeds such as couch grass and bindweed can regrow from small root or stem fragments, so lift them carefully with a fork and remove as much root as practical. Do not rotavate through them. Brambles need gloves and controlled cutting; check for nesting birds and wildlife before disturbing dense growth. Set aside recognisable existing crops and useful fruit plants rather than clearing blindly.
Separate clean compostable plant material from rubbish. Healthy annual weeds and crop residues can usually be composted; diseased plants, weed roots that readily regrow, invasive plants and unknown waste need a suitable site-specific disposal route. Keep piles stable and paths clear, and check vegetation for wildlife before moving it.
- Hand clearing suits a small first bed, mixed vegetation and situations where you need to identify roots or preserve existing plants.
- Mulching with a generous layer of suitable organic matter can improve soil and suppress some weeds on a clean or lightly weedy bed; remove or suppress persistent perennial weeds first. Keep mulch away from plant crowns and stems.
- Covering with a secure, opaque, reusable ground cover can suppress growth on an area you are not planting yet. Overgrown ground may need at least a growing season under cover, and roots of persistent weeds may survive; check beneath it and follow site rules about materials. Do not use old carpet, which may contain contaminants and can shed fibres.
- Digging can help when you need to remove perennial roots or open compacted soil, but it is not compulsory. Work only when soil crumbles rather than smears; working waterlogged or frozen ground damages structure. A no-dig approach with compost mulch is another option where the weed burden and materials allow.
- Avoid routine weedkiller use. If a problem seems to require a pesticide, first consider identification and non-chemical control, and follow current product labels and site rules; never spray near other plots or water without checking restrictions.
Week 3 — plan a practical layout
Plan around access and maintenance rather than fitting in the maximum number of beds. Beds that can be reached from both sides are commonly kept around 1.2 metres wide or less, but choose a width that suits your reach and mobility. Leave paths wide and firm enough for a wheelbarrow if you use one. Keep the main route to the gate, tap, compost and shed clear.
Place sun-loving crops in the brightest area, taller crops where they will cause the least unwanted shade, and thirsty beds within easy reach of water. Group crops with similar care together. Leave room to turn a wheelbarrow, work safely and expand later. A simple sketch is enough at first; the existing Plot Planner lets you design your plot to scale and test paths, beds and structures before moving materials.
- Draw plot boundaries, gates, fixed structures, existing fruit and areas of shade before adding new beds.
- Add a small number of accessible beds, practical paths, a composting area and tool storage that meet site rules.
- Allow safe clearances around sheds, taps, boundaries and any permitted greenhouse or polytunnel; check permissions and anchoring requirements before buying a structure.
- Keep space for future expansion and avoid creating narrow dead ends or paths that will be blocked by mature crops.
Week 4 — start growing
Choose crops for the actual month, your region, soil and available protection. The planting calendar and crop guides give timing windows, not guarantees: north-facing, upland, coastal and exposed plots can run later than sheltered southern sites, and a cold, wet bed may need more time than the calendar suggests.
For a quick start, buy a few healthy young plants of crops currently ready for planting, or sow easy crops directly when the packet and soil conditions agree. Direct-sown crops such as carrots dislike root disturbance; many brassicas can be raised in modules and transplanted. Indoor sowing gives a head start to crops needing warmth, but seedlings need strong light, adequate space and gradual hardening off before planting outside.
- Check the seed packet for month, depth, spacing, temperature and whether to sow indoors, in modules or directly in the bed.
- Plant into workable soil, water new plants in, label crop and variety, and leave the recommended spacing to reduce competition and disease.
- Keep fleece or cloches ready for cold nights, but ventilate them in warm weather and secure netting so wildlife cannot become trapped.
- Check moisture at root depth. Seedlings and new transplants need closer attention than established plants; water the soil around roots and adjust after rain.
- Start with a few crops you enjoy eating and can look after. A small sowing repeated later can be easier to manage than a large glut.
If you get your plot in autumn or winter
A new allotment can be started at any time of year. In autumn and winter, the first month may be mostly observation, clearing, planning and protecting soil rather than sowing vegetables. Use mild, dry spells to remove rubbish and tackle a manageable area, but stay off frozen or saturated beds and avoid digging soil that sticks to boots and tools.
Cover bare soil with suitable compost or leaf mould where practical, or use a secure, site-approved opaque cover on areas not yet ready. Compost leaves separately for leaf mould if you have room. Check existing overwintering crops and protect them without smothering them. Depending on month, region and conditions, hardy broad beans, garlic or some salad leaves may be possible; check crop-specific guidance and local conditions rather than forcing a universal winter sowing list.
Use darker months to draw a plan, identify established fruit, repair tools, arrange permitted materials and read the planting calendar. Prepare a few beds as soon as soil becomes workable, then be ready to sow when the soil temperature, day length and forecast suit the crop.
Budgeting for your first allotment
Set a first-season limit and buy in stages. A basic tool kit, a small selection of seeds or young plants, labels and a way to carry water may be enough to begin. Actual costs depend on what the plot already contains, the site’s facilities and what you can borrow or reuse, so use this as a planning framework rather than a price list.
- Prioritise: safe footwear and gloves, a sound hand tool or two, watering can if needed, a few seed packets or plants suited to the season, labels and modest quantities of appropriate compost or mulch.
- Plan next: path material, bed edging, extra compost bins or a wheelbarrow after you have measured and checked site rules.
- Treat as optional: raised-bed kits, greenhouse or polytunnel, powered tools, irrigation systems and specialist products. They can be useful, but are not prerequisites for growing food.
- Save money by borrowing tools, buying sturdy second-hand items, sharing deliveries with neighbours, reusing safe untreated materials and growing from seed when timing and space suit you.
- Ask before accepting unknown soil, manure, compost or building materials. Contamination and unsuitable treated materials can cost more to fix than to avoid.
Common beginner mistakes and how to avoid them
- Trying to clear the entire plot at once: choose one bed and cover or schedule the rest in stages.
- Buying equipment before measuring or checking rules: sketch the plot and borrow first.
- Growing too many crops: choose a handful you eat and can visit regularly.
- Ignoring site rules: ask before building, burning, storing waste, keeping animals or using a hose.
- Planting without watching sunlight: map shade before assigning beds and tall crops.
- Forgetting water access: locate taps, understand restrictions and keep thirsty crops reachable.
- Removing established plants without identification: photograph and ask before digging out possible fruit or perennial crops.
- Underestimating perennial weeds: identify them, lift roots carefully, avoid rotavating and keep infested material out of ordinary cold compost.
- Working wet soil: wait until it is workable to protect structure and avoid compaction.
- Making paths too narrow or beds too wide: test reach and wheelbarrow access before fixing edges.
- Expecting a finished plot in a month: agree small goals and let the plot develop over seasons.
Your first 30 days checklist
Use this as a flexible sequence, not a deadline. Weather, work, health, plot condition and the time of year may change the pace.
- Week 1: read the agreement; meet the site contact; photograph, measure and map the plot; locate water; note hazards, sun, shade and existing plants.
- Week 2: choose one safe area; sort rubbish only through an approved route; identify and tackle weeds carefully; start or locate a compost area if allowed.
- Week 3: sketch paths and manageable beds; check the scale in the Plot Planner; decide what can be borrowed or reused before buying.
- Week 4: choose seasonally suitable crops; sow or plant a small amount; label it; water as needed; make a simple weekly visit and observation routine.
- At any point: pause when soil is waterlogged or frozen, ask for help with uncertain plants or waste, and revise goals to fit your circumstances.
Your next three months
Keep the first growing area productive and manageable before expanding. Visit often enough to notice dry pots, weeds before they seed, loose netting and harvests ready to pick. Record sowing dates, varieties, weather, watering problems and what you would change. A notebook or the existing My Growing Year tools can help turn observations into next season’s plan.
Where the crop and season allow, sow small follow-on batches rather than everything at once. Keep composting suitable plant material, mulch after watering or rain when soil is moist, and expand one bed at a time. Check crops for pests and damage regularly; use barriers and hand removal where appropriate, and seek reliable identification before taking action. Review your plot map as plants grow and keep paths and access clear.
Frequently asked questions
- How much time does an allotment take? It varies with plot size, crops, weather and how much is already cultivated. Start with an area you can visit reliably; summer watering and harvesting may need more frequent attention than winter planning.
- Do I need to dig the whole plot? No. Digging can help with some jobs, but you can prepare a bed at a time and use mulching or other low-disturbance methods where suitable.
- Can I start an allotment in winter? Yes. Inspect, clear safely, compost, mulch, plan and prepare beds when soil is workable. Some hardy crops may suit the season, depending on region and timing.
- What should I grow first? Choose crops you like, suited to the month and conditions. Salad leaves, radishes, peas, beans, potatoes or young brassicas may be options at different times; check the calendar and crop guide before sowing.
- Do I need raised beds? No. They can help with access or wet/heavy soil, but beds at ground level are productive too. Check site rules and source safe materials before building.
- How do I deal with an overgrown plot? Clear a safe small area, identify plants and perennial weeds, remove hazardous waste through the correct route, and cover or schedule the rest. Several seasons is a reasonable timescale for a difficult plot.
- What tools do I actually need? Begin with gloves, suitable boots, a hand fork, trowel, spade or digging fork, hoe, rake and watering can as needed. Borrow before buying specialist tools.
- How do I improve poor soil? First observe drainage and texture; add suitable mature organic matter over time and avoid working wet soil. If a specific nutrient or pH problem is suspected, use a soil test before applying amendments.
- Can I grow vegetables before clearing the entire plot? Yes. A prepared, weed-managed bed can produce crops while other areas are covered or cleared later.
- How much should I spend initially? There is no required spend. Set a modest budget for safety, a few tools, seasonal seeds or plants and only the materials needed for the first bed; defer structures and machinery.
Useful further reading
Advice on allotments, sowing, composting, watering and crop rotation varies with site and conditions. These UK sources informed the practical guidance in this handbook.